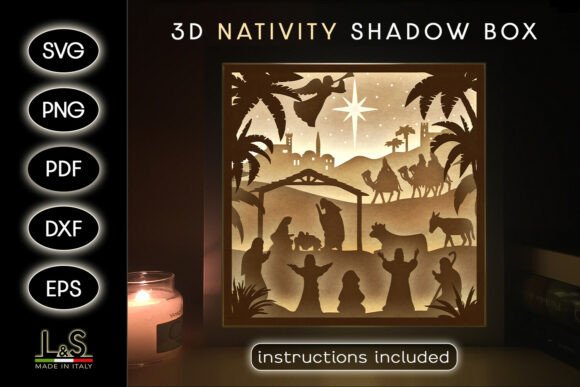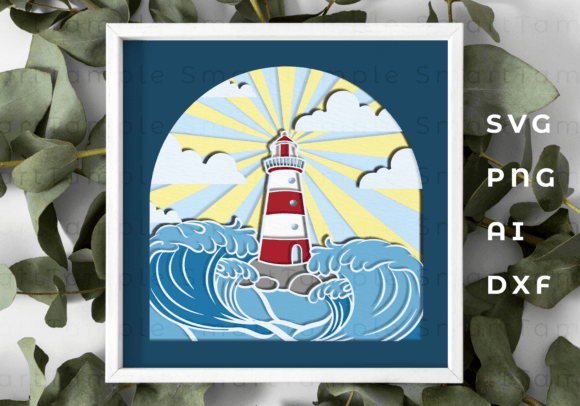
Mastering the Lighthouse Ocean Waves Shadow Box SVG for Precision Cutting
Creating a layered paper art piece that captures the serene beauty of a coastal scene requires more than just a pretty design; it demands technical precision and an understanding of how digital files translate into physical objects. The Lighthouse Ocean Waves Shadow Box SVG is a sophisticated vector model designed specifically for this purpose. Whether you are using a CNC router, a laser cutter, or desktop machines like Silhouette, Cricut, or Cameo, this digital asset provides the foundational geometry needed to build depth and dimension. However, many creators rush into the cutting process without fully evaluating the file structure or material compatibility, leading to wasted resources and frustrating results. Understanding the nuances of this specific design can transform a good project into a professional-grade display.
Understanding the Layered Design Architecture
At its core, this product is not merely a single image but a complex assembly of vector paths intended to be cut from separate sheets of material. The Layered Design allows light and shadow to interact, creating a three-dimensional effect when stacked. The digital package typically includes SVG, AI, PNG, and DXF formats, ensuring compatibility across a wide spectrum of hardware. Before you begin, it is crucial to recognize that each format serves a different function. SVG and AI files retain editable vector paths, which are essential for resizing without losing quality. DXF is often preferred for industrial CNC applications, while PNGs serve as visual references for layer ordering.
A common misunderstanding among beginners is assuming that all layers are created equal. In a high-quality shadow box design, the foreground elements, such as the lighthouse structure, require different tolerances than the background ocean waves. If you treat every layer with the same cutting settings, you may find that intricate details tear or that larger pieces do not align correctly during assembly. Taking the time to inspect the vector nodes in your software before sending the job to your machine is a non-negotiable step for achieving clean edges.
Material Selection and Its Impact on Detail
One of the most frequent errors creators make is selecting materials based solely on availability rather than suitability. The Lighthouse Ocean Waves Shadow Box SVG is versatile, supporting cardboard, paper, plastic, metal, plywood, wood, and MDF. However, each material reacts differently to cutting forces. For instance, using heavy cardstock for the finest wave details might result in fraying if the blade pressure is too high. Conversely, using thin paper for structural elements like the lighthouse tower can lead to warping when adhesive is applied.
Consider the end goal of your project. If you are aiming for a rustic, textured look, plywood or MDF offers excellent rigidity and natural grain. However, these materials require precise laser power settings to avoid charring the edges, which can obscure the delicate wave patterns. For a cleaner, more modern aesthetic, acrylic or plastic provides sharp lines but requires careful handling to prevent scratching during the weeding process. Always test a small section of your design on your chosen material before committing to the full cut. This simple step saves time and prevents the disappointment of ruining expensive sheets of wood or metal.
Navigating File Compatibility and Software Settings
While the inclusion of multiple file formats is a significant advantage, it also introduces the potential for user error. Many users download the ZIP archive and immediately load the SVG into their cutting software without checking the scale. Vector files can sometimes import at unexpected sizes, depending on the software’s default units (inches versus millimeters). If you cut your layers at inconsistent scales, the shadow box will not assemble correctly, leaving gaps or causing overlaps that ruin the visual depth.
Another overlooked detail is the handling of anchor points in AI and SVG files. Complex curves in the ocean waves may contain excessive nodes, which can cause older cutting machines to stutter or pause frequently. Simplifying these paths in your design software can improve cutting speed and smoothness. Additionally, ensure that your software recognizes the color coding or layer separation intended by the designer. Some programs may merge all layers into a single cut path, defeating the purpose of the layered design. Double-check your cut preview screen to confirm that each layer is distinct and assigned to the correct tool or mat position.
Assembly Techniques for Professional Results
The cutting phase is only half the battle; the assembly determines the final quality of your shadow box. A prevalent mistake is rushing the gluing process. Using too much adhesive can cause paper to buckle or wood to stain, particularly around the intricate wave details. Instead, apply minimal amounts of glue using a fine-tip applicator or double-sided tape for cleaner bonds. Start assembling from the background layer and work your way forward, ensuring each layer is perfectly aligned before adding the next.
Spacing is another critical factor. Traditional shadow boxes use foam spacers between layers to create depth. If you skip this step or use uneven spacers, the lighting effect will be inconsistent, and the lighthouse may not stand out as intended. Measure your spacer thickness carefully and ensure it matches the depth of your frame. For those using rigid materials like plywood, consider integrating standoffs or recessed channels into the design if the SVG allows for modification, providing a more durable and polished finish.
Verifying Quality Before Purchase and Use
Before downloading or purchasing any digital cutting file, it is wise to evaluate the provider’s support and file integrity. Since this is a digital product, you cannot physically inspect it beforehand. Look for clear previews that show the layer separation. Reputable designers will provide instructions or tips for assembly. If you require a specific file type not listed, such as EPS or PDF, contact the seller immediately. Most creators are willing to accommodate reasonable requests, but this must be done before payment to ensure you receive the correct ZIP archive.
Additionally, check the complexity of the design against your machine’s capabilities. If you are using a basic die-cutting machine without advanced vector editing software, ensure the SVG is pre-optimized. Complex designs may require manual cleanup, which can be time-consuming for beginners. By verifying these details upfront, you avoid the frustration of incompatible files and ensure a smoother creative process.
Maximizing the Potential of Your Project
To truly elevate your Lighthouse Ocean Waves Shadow Box SVG project, consider experimenting with lighting. LED strips placed behind the layers can enhance the oceanic theme, making the waves appear to glow. Choose warm white lights for a sunset effect or cool blue tones for a moonlit scene. This addition transforms the static paper or wood cutout into a dynamic piece of decor. Furthermore, framing plays a vital role. A deep-set frame with a glass front protects the layers from dust and damage while enhancing the professional appearance of your work.
By paying attention to material choice, file preparation, and assembly techniques, you can avoid common pitfalls and produce a stunning shadow box. This design offers a rewarding challenge for both hobbyists and professionals, providing a tangible result that showcases skill and creativity. Take the time to plan, test, and execute with care, and your lighthouse scene will become a standout piece in any collection.