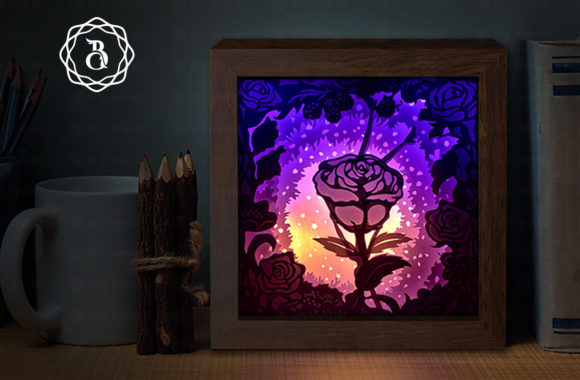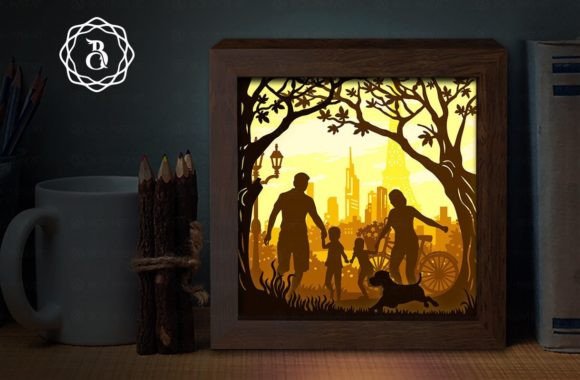
Creating a Stunning Family Shadow Box: A Guide to Perfect Paper Layering and Light
The allure of a Family Shadow Box lies in its ability to transform simple materials into a captivating three-dimensional narrative. Unlike traditional flat photography or standard wall art, these layered paper creations offer depth, texture, and an ethereal glow when illuminated. The concept is deceptively simple: meticulous cut paper layers stacked within a frame, backlit by LED lights to create dramatic silhouettes and soft gradients. However, the difference between a mediocre craft project and a professional-grade piece often comes down to understanding the nuances of material selection, file preparation, and assembly technique.
For many creators, whether you are a hobbyist looking for a heartfelt gift or a small business owner expanding your product line, the journey begins with a digital template. These templates, often available as instant downloads, provide the structural backbone for your project. Yet, relying solely on the digital file without considering the physical realities of paper crafting can lead to frustration. Let’s explore the common pitfalls associated with creating these light boxes and how to avoid them to ensure your final product sparkles exactly as intended.
The Misconception of Paper Weight and Opacity
One of the most frequent mistakes beginners make is underestimating the importance of paper grammage. When you see a template labeled for 8x8 inch layers, it is tempting to use whatever cardstock you have on hand. However, using paper that is too thin (below 180 gsm) can result in layers that warp, tear during weeding, or fail to hold their shape when stacked. Conversely, paper that is too thick may not allow light to permeate effectively, resulting in a dark, muddy appearance rather than the desired glowing effect.
The Fix: Aim for paper between 180 and 220 gsm. This weight offers the perfect balance of rigidity and translucency. White paper is the standard choice for the classic "Family Light box" aesthetic because it diffuses light evenly, creating soft shadows and highlights. If you choose to experiment with colored papers, be aware that darker hues absorb more light. To compensate, you may need to increase the brightness of your LED strip or reduce the number of dense layers in specific areas. Always test a single layer with your light source before committing to the full assembly.
Overlooking the Precision of Cutting Tools
While the digital files provided in SVG, JPG, and PDF formats are designed for precision, the tool you use to cut them dictates the final quality. Many novices attempt to cut intricate details by hand with a standard pair of scissors or a dull craft knife. This approach often leads to jagged edges, torn bridges, and misaligned layers, which become glaringly obvious when the box is lit up. The light accentuates every imperfection.
The Better Approach: If you have access to a Cricut machine or similar cutting plotter, use it. These machines ensure that every curve and corner is crisp and consistent, significantly speeding up the process and improving accuracy. If you must cut by hand, invest in a high-quality, sharp art knife and replace the blade frequently. A dull blade drags the paper rather than slicing it, causing fraying. Additionally, ensure your cutting mat is clean and sticky enough to hold the paper firmly in place without shifting.
Neglecting Depth and Spacing
A flat stack of paper looks like a collage; a shadow box requires depth. A common oversight is stacking the layers directly on top of one another without adequate spacing. Without separation, the light cannot travel between the layers, eliminating the 3D effect and the subtle interplay of shadows that defines this art form.
Practical Advice: Use 5mm foam board or specialized foam tape spacers between each layer. This creates the necessary air gaps for light to scatter and for the eye to perceive depth. When assembling, ensure that the spacers are cut slightly smaller than the paper layers so they remain hidden from view. Consistency is key here; uneven spacing can cause the layers to tilt, leading to an asymmetrical final product. Take your time to align each layer perfectly before adhering it to the next.
Choosing the Wrong Lighting Solution
The "magic" of the Family Shadow Box happens when the lights go on. Yet, many creators treat the lighting as an afterthought. Using weak battery-operated puck lights or uneven string lights can result in hotspots and dark corners, ruining the visual harmony. Furthermore, failing to consider the color temperature of the LEDs can alter the mood of the piece. Cool white lights may feel clinical, while warm white lights create a cozy, inviting atmosphere.
Recommendation: Opt for an RGB LED strip with a reliable power supply. RGB strips allow you to adjust both the brightness and the color, giving you flexibility to match the room’s decor or the occasion. Ensure the LED strip is installed evenly along the back or sides of the frame, depending on the design. Diffusing the light with a thin sheet of tracing paper or vellum behind the last layer can help eliminate visible LED dots and create a uniform glow.
Ignoring File Compatibility and Scaling Issues
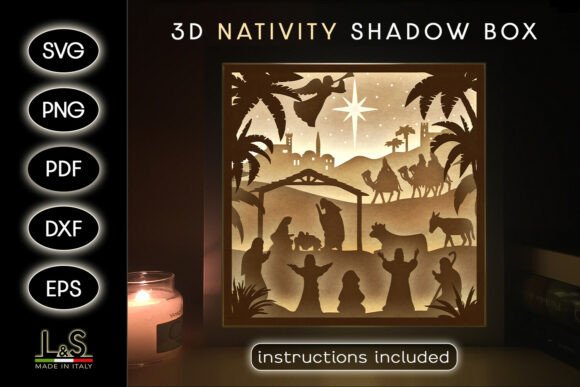
Since this is a digital product for instant download, users must be prepared to handle various file formats. SVG files are ideal for cutting machines, while PDFs are better for manual printing and cutting. A frequent error is resizing the files without maintaining the aspect ratio or adjusting the cut settings accordingly. Changing the size from the standard 8x8 inches without recalibrating your machine can lead to parts that do not fit the frame.
What to Check: Before cutting, always verify the dimensions in your software. If you need to change the file size, do so proportionally. If you encounter issues with the file or need custom sizes, reach out to the creator. Most designers are willing to help troubleshoot or provide adjusted files. Remember, the template includes eight distinct layers, each contributing to the overall scene. Skipping a layer or misordering them can disrupt the narrative flow of the image.
Final Assembly and Presentation
The final step is housing your creation in a shadow box frame. Ensure the frame is deep enough to accommodate all eight layers plus the spacers and the backing. A shallow frame will compress the layers, flattening the effect. Secure the assembly firmly to prevent shifting during transport or hanging. This piece serves not just as a night light but as a sparkling room decoration, so ensure the exterior of the frame is clean and free of glue residues.
Creating a Family Shadow Box is a rewarding endeavor that blends technical precision with artistic expression. By paying attention to paper quality, cutting precision, layer spacing, and lighting choices, you can avoid common pitfalls and produce a stunning piece that captivates viewers. Whether you are making this for a loved one or adding it to your creative portfolio, the effort invested in these details will shine through in the final glow.